
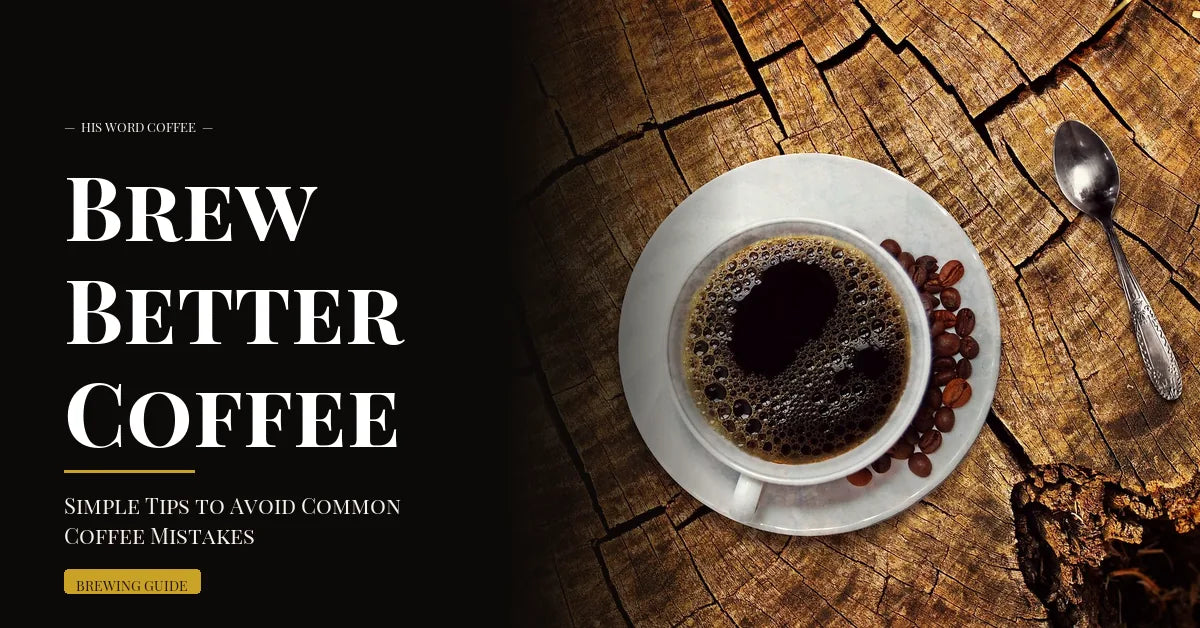
Brew Better Coffee: Simple Tips to Avoid Common Coffee Mistakes
Master the art of brewing exceptional coffee at home by avoiding these 8 critical mistakes that ruin even the best beans.
Key Takeaways
- Fresh is everything: Use coffee within 4-6 weeks of roasting for optimal flavor
- Grind size matters: Match your grind to your brewing method (coarse for French press, fine for espresso)
- Temperature control: Brew with water between 195-205°F to avoid bitter or weak coffee
- Water quality counts: Use filtered water since coffee is 98% water
- Measure precisely: Follow the 1:16 to 1:17 coffee-to-water ratio for consistent results
- Store properly: Keep beans in an airtight container at room temperature, never refrigerated
- Clean equipment regularly: Prevent rancid oils from ruining your brew
- Don't skip the bloom: Allow 30-45 seconds for CO2 release and even extraction
Table of Contents
- Why Does Homemade Coffee Taste Bad?
- What Are the Most Common Coffee Brewing Mistakes?
- Mistake #1: Using Stale Coffee
- Mistake #2: Wrong Grind Size for Your Brewing Method
- Mistake #3: Incorrect Water Temperature
- Mistake #4: Poor Water Quality
- Mistake #5: Wrong Coffee-to-Water Ratio
- Mistake #6: Improper Coffee Storage
- Mistake #7: Not Cleaning Your Equipment
- Mistake #8: Rushing the Bloom
- Before and After: Wrong vs. Right Approach
- Quick Reference Table: Mistakes and Fixes
- Frequently Asked Questions
Why Does Homemade Coffee Taste Bad?
You invested in quality beans, followed the brewing instructions, and still ended up with coffee that tastes bitter, weak, or just plain disappointing. The frustration is real, and you're not alone. The truth is, brewing exceptional coffee at home isn't about expensive equipment or barista-level skills, it's about avoiding common mistakes that sabotage even the best beans.
Most coffee enthusiasts unknowingly make critical errors that dramatically impact flavor. From using stale coffee to improper water temperature, these mistakes compound to create subpar results. The good news? Once you understand what you're doing wrong, fixing these issues is remarkably simple.
Get Better Coffee Every Week
Join our newsletter for brewing guides and honest answers to the questions coffee drinkers actually have.
In this comprehensive guide, we'll explore the 8 most common coffee brewing mistakes and provide practical, actionable solutions to transform your daily cup. Whether you're brewing with a French press, pour-over, drip machine, or espresso maker, these fundamental principles apply universally.
What Are the Most Common Coffee Brewing Mistakes?
After analyzing thousands of home brewing setups and consulting with coffee experts, we've identified 8 critical mistakes that account for 95% of coffee quality issues. These errors fall into three main categories: ingredient quality (coffee freshness and water), technique (grind size, temperature, and ratios), and maintenance (storage and cleaning).
The impact of these mistakes varies, but they all share one thing in common: they're easily preventable with basic knowledge and minor adjustments to your routine. Let's look at each mistake, understand why it happens, and learn exactly how to fix it.
-
Mistake #1: Using Stale Coffee
The Problem: Coffee begins losing flavor immediately after roasting. Within weeks, the oils oxidize and aromatic compounds break down, leaving you with flat, cardboard-like coffee no matter how perfectly you brew it.
Why It Happens: Many people buy large quantities of pre-ground coffee from supermarkets without checking roast dates. They assume coffee lasts months or even years because the bag says "best by 2026." In reality, coffee reaches peak flavor 3-14 days after roasting and significantly degrades after 4-6 weeks.
The Fix: Always check the roast date (not just the "best by" date) and purchase coffee roasted within the last 2-4 weeks. Buy smaller quantities more frequently rather than bulk purchases. If the bag doesn't have a roast date, find a different roaster who values transparency. At His Word Coffee, every bag includes the exact roast date so you know you're getting peak freshness.
Pro Tip: Whole Beans vs. Pre-Ground
Whole beans maintain freshness 3-4 times longer than pre-ground coffee. Ground coffee exposes exponentially more surface area to oxygen, accelerating staleness. Invest in a burr grinder and grind immediately before brewing for the biggest flavor upgrade possible.
-
Mistake #2: Wrong Grind Size for Your Brewing Method
The Problem: Grind size directly controls extraction rate. Too fine, and you over-extract, creating bitter, harsh coffee. Too coarse, and you under-extract, producing weak, sour coffee. Each brewing method requires a specific grind size for optimal extraction.
Why It Happens: People use whatever grind setting came with their grinder or buy pre-ground coffee labeled "universal grind." There's no such thing as universal grind. French press needs coarse grounds, drip needs medium, and espresso needs fine. Using the wrong size guarantees poor results.
The Fix: Match your grind to your method:
- Extra coarse: cold brew (steeping for 12-24 hours)
- Coarse: French press, percolator (like sea salt)
- Medium-coarse: Chemex, Clever dripper
- Medium: Drip coffee makers, pour-over cones (like sand)
- Medium-fine: Moka pot, AeroPress (shorter brew)
- Fine: Espresso machines (like baker's sugar)
- Extra fine: Turkish coffee (like flour)
If your coffee tastes bitter, try a coarser grind. If it tastes weak or sour, go finer. Make small adjustments and taste the difference.
-
Mistake #3: Incorrect Water Temperature
The Problem: Water temperature dramatically affects extraction chemistry. Too hot (above 205°F), and you burn the coffee, extracting harsh, bitter compounds. Too cool (below 195°F), and you fail to extract flavor oils, producing weak, underwhelming coffee.
Why It Happens: Most people either use boiling water straight from the kettle (212°F) or water that's been sitting and cooled too much. Without a thermometer, it's guesswork, and most drip machines brew too cool to properly extract specialty coffee (the SCA's standards).
The Fix: The ideal brewing temperature is 195-205°F (90-96°C). If you don't have a temperature-controlled kettle:
- Bring water to a boil, then let it rest for 30-45 seconds before pouring
- This brings the temperature down from 212°F to approximately 200-205°F
- Invest in an inexpensive thermometer ($10-15) for precision
- For lighter roasts, aim toward 205°F; for darker roasts, stay closer to 195°F
If you're using an automatic drip machine, check manufacturer specs. Many cheaper models brew at 180-190°F, which is too cool for optimal extraction. Upgrading to an SCA-certified coffee maker ensures proper temperature control.
-
Mistake #4: Poor Water Quality
The Problem: Coffee is 98% water. If your water tastes bad, your coffee will taste bad. Chlorine, minerals, and impurities in tap water create off-flavors that mask coffee's natural characteristics. Even expensive beans can't overcome poor water quality.
Why It Happens: Most people use straight tap water without considering its impact. Municipal water treatment adds chlorine, while hard water contains excessive minerals. Conversely, distilled water lacks the minerals needed to properly extract coffee compounds.
The Fix: Use filtered water with balanced mineral content. Options include:
- Carbon filter pitcher: Removes chlorine and some impurities (Brita, PUR)
- Faucet-mounted filter: More thorough filtration for everyday use
- Bottled spring water: Convenient and consistently good (avoid distilled water)
- Remineralized water: For enthusiasts, add mineral packets to distilled water for perfect balance
Quick test: If you wouldn't drink your tap water straight, don't brew coffee with it. The investment in filtered water costs pennies per cup but makes a dramatic difference in taste.
-
Mistake #5: Wrong Coffee-to-Water Ratio
The Problem: Using too little coffee creates weak, watery results. Using too much wastes money and creates muddy, overpowering bitterness. Most people eyeball measurements, leading to inconsistent results where some days are great and others disappointing.
Why It Happens: Coffee scoops vary wildly in size, and volumetric measurements (tablespoons) are imprecise because coffee density changes with roast level and grind size. Without a scale, you're guessing, and guessing guarantees inconsistency.
The Fix: Use a digital scale and follow the golden ratio of 1:16 to 1:17 (coffee to water by weight). This means:

Brew Better Coffee: Simple Tips to Avoid Common Coffee Mista - For a strong cup: 1 gram coffee to 16ml water (1:16 ratio)
- For a balanced cup: 1 gram coffee to 16.5ml water
- For a lighter cup: 1 gram coffee to 17ml water (1:17 ratio)
Practical example: For 500ml (about 17oz) of coffee, use 30 grams of beans (1:16.7 ratio). This produces 2 generous mugs of perfectly balanced coffee. Start here and adjust to your preference.
A basic digital scale costs $10-20 and transforms coffee quality by eliminating the biggest variable in home brewing: inconsistent measurements.
-
Mistake #6: Improper Coffee Storage
The Problem: Coffee's four enemies are oxygen, light, heat, and moisture. Exposure to any of these accelerates staleness, destroying the delicate oils and aromatics that create exceptional flavor. Improper storage can turn fresh beans into stale coffee in days instead of weeks.
Why It Happens: People store coffee in the original bag (often not airtight), leave it on the counter near the stove (heat exposure), or even refrigerate/freeze it (moisture damage). These well-intentioned mistakes destroy coffee quality.
The Fix: Follow these storage best practices:
- Use an airtight container: Transfer beans to a container with a one-way CO2 valve or tight seal
- Keep it cool and dark: Store in a pantry or cabinet, away from sunlight and heat sources
- Maintain room temperature: Never refrigerate or freeze coffee (temperature fluctuations create condensation)
- Buy appropriate quantities: Purchase only what you'll use within 2-3 weeks
- Keep beans whole: Only grind what you need immediately before brewing
Common Storage Myth: Freezing Coffee
Many people freeze coffee thinking it preserves freshness. In reality, freezing causes moisture condensation every time you remove the bag, rapidly degrading quality. The only exception: freezing whole beans in individual, vacuum-sealed portions for long-term storage (3+ months), but this is rarely necessary if you buy fresh coffee regularly.
-
Mistake #7: Not Cleaning Your Equipment
The Problem: Coffee oils build up on grinders, brewers, and carafes, turning rancid within days. These rancid oils contaminate every batch you brew, creating bitter, stale flavors that have nothing to do with your beans. Even fresh, expensive coffee tastes terrible when brewed in dirty equipment.
Why It Happens: Coffee equipment seems clean after a quick rinse, so people assume it's fine. But invisible oil residue accumulates in grinder burrs, machine components, and carafe walls. Over time, this buildup creates a layer of rancidity that ruins coffee.
The Fix: Establish a regular cleaning routine:
- After every use: Rinse all removable parts with hot water, wipe down the carafe
- Weekly: Wash removable parts with mild dish soap, rinse thoroughly
- Every 2-4 weeks: Deep clean your coffee maker with a vinegar solution (equal parts water and white vinegar) or specialized coffee machine cleaner, run 2-3 cycles of fresh water to rinse
- Monthly: Clean your grinder by running grinder cleaning tablets or grinding white rice to remove oil buildup
Pay special attention to often-missed areas: the underside of the coffee maker lid, the grinder chute, and the carafe spout. These spots harbor the most buildup and create the worst off-flavors.
-
Mistake #8: Rushing the Bloom
The Problem: Freshly roasted coffee releases CO2 gas for days after roasting. This gas creates air pockets that prevent water from evenly saturating the grounds, leading to uneven extraction. Without a proper bloom, some coffee over-extracts (bitter) while other parts under-extract (sour), creating a muddled, unbalanced cup.
Why It Happens: Most people don't know blooming exists or why it matters. They pour all the water at once, trapping CO2 and preventing even saturation. Automatic drip machines skip this step entirely, which is one reason pour-over often tastes better.
The Fix: For pour-over, French press, or any manual method:
- Pour water equal to 2x the weight of your coffee grounds (e.g., 60g water for 30g coffee)
- Start a timer and wait 30-45 seconds
- You'll see the grounds "bloom" as they release CO2 and expand
- After 30-45 seconds, continue with your normal brewing process
This simple 30-second step dramatically improves extraction consistency, resulting in cleaner, more balanced coffee with better clarity and sweetness. It's the difference between good coffee and great coffee.
Note: Very stale coffee won't bloom much because it's already degassed: another sign your beans are past their prime and need replacing.
Before and After: Wrong vs. Right Approach
Let's compare two typical morning coffee routines to see how these mistakes compound, and how the fixes create dramatically better results.
Wrong Approach (Common Mistakes)
- Use 6-month-old pre-ground coffee from the supermarket
- Eyeball "a few scoops" into the filter
- Pour boiling water directly from kettle (212°F)
- Use unfiltered tap water with chlorine taste
- Brew in a machine that hasn't been cleaned in months
- Store opened coffee bag next to the warm stove
- Pour immediately without blooming
- Wonder why expensive coffee tastes bitter and flat
Right Approach (Best Practices)
- Use whole beans roasted within the last 3 weeks
- Weigh 30g coffee and grind fresh to medium consistency
- Heat filtered water to 200°F (let boiling water rest 30 seconds)
- Use carbon-filtered water for clean, pure taste
- Brew in a clean coffee maker (deep cleaned last week)
- Store beans in airtight container in cool pantry
- Bloom grounds with 60g water for 30 seconds first
- Enjoy exceptional, balanced coffee that showcases bean quality
The time investment is nearly identical: maybe 2 extra minutes. But the quality difference is transformative. The right approach costs slightly more for fresh beans and a scale, but you'll actually enjoy your coffee and won't waste money on beans that taste bad.
Quick Reference Table: Coffee Mistakes and Fixes
Save this table for easy reference when troubleshooting your brew:
| Mistake | Quick Fix |
|---|---|
| Using stale coffee (no roast date) | Buy beans with roast date, use within 4-6 weeks of roasting |
| Wrong grind size (bitter or weak coffee) | Match grind to method: coarse for French press, medium for drip, fine for espresso |
| Boiling water (212°F+) burns coffee | Use 195-205°F water (let boiling water rest 30-45 seconds) |
| Tap water with chlorine/impurities | Switch to filtered or bottled water with balanced minerals |
| Eyeballing measurements (inconsistent results) | Use scale, follow 1:16 to 1:17 ratio (30g coffee to 500ml water) |
| Storing in original bag on counter | Transfer to airtight container, store in cool, dark pantry |
| Never cleaning equipment (rancid oils) | Rinse after each use, deep clean every 2-4 weeks with vinegar solution |
| Skipping the bloom (uneven extraction) | Pour 2x coffee weight in water, wait 30-45 seconds before continuing |
Frequently Asked Questions
Start Brewing Better Coffee Today
Now that you know the mistakes to avoid, you need quality beans that showcase proper brewing technique. His Word Coffee sources exceptional beans roasted fresh to order, so you always start with peak flavor potential.
Every bag includes the exact roast date and brewing recommendations to help you achieve cafe-quality results at home. Experience coffee the way it's meant to taste.
Shop Fresh Roasted CoffeeConclusion: Small Changes, Exceptional Results
The difference between mediocre coffee and exceptional coffee isn't expensive equipment or professional training, it's avoiding these 8 common mistakes. By using fresh beans, matching grind size to your brewing method, controlling water temperature and quality, measuring precisely, storing properly, cleaning regularly, and allowing proper bloom time, you'll transform your daily coffee routine.
Each fix is simple and takes minimal extra time, but together they create dramatically better results. Start by addressing the mistakes that affect you most (likely fresh coffee, water quality, and proper ratios), then systematically improve other areas. Within a week, you'll taste the difference.
Remember, even the most expensive beans can't overcome poor technique, but proper brewing makes good beans taste exceptional. Master these fundamentals, invest in quality beans with transparent roast dates, and enjoy coffee that rivals your favorite cafe: brewed in the comfort of your own home.
Sources: Specialty Coffee Association, Brewing Best Practices.
Want help implementing these fixes this week?
Start with one variable: grind, temperature, or pour discipline. Then move on to timing and ratio.
Leave a comment
This site is protected by hCaptcha and the hCaptcha Privacy Policy and Terms of Service apply.