
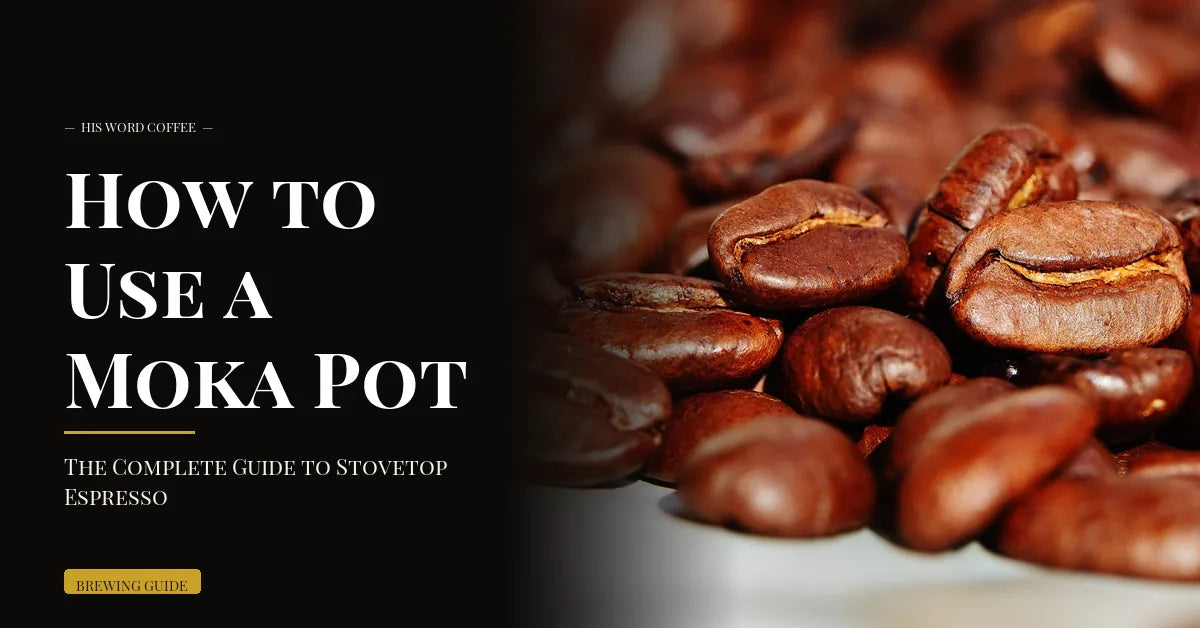
The Moka pot is a stovetop coffee maker that has been brewing bold, satisfying coffee in Italian kitchens since 1933. It costs less than a dinner out, requires no electricity, and produces coffee that is richer and stronger than anything a drip machine can offer. This guide covers everything you need to know to use one correctly, from first brew to daily ritual.
Key Takeaways
- The Moka pot uses steam pressure to push water through ground coffee, producing strong, concentrated coffee.
- Use medium-fine ground coffee and never tamp it down.
- Brew on medium-low heat and remove from heat as soon as the gurgling starts.
- Pre-heat your water for better flavor and faster extraction.
- Clean with hot water only, no soap, to preserve the seasoned oils.
In This Guide
What Is a Moka Pot?
The Moka pot is a stovetop coffee maker invented in 1933 by Alfonso Bialetti, an Italian engineer who wanted to bring cafe-quality coffee into the home kitchen. He named it after the Yemeni city of Mokha, one of the world's original coffee trading centers. The octagonal aluminum design he created is still the most recognized version sold today.
The Moka pot works by using the steam pressure generated inside the sealed bottom chamber to push hot water up through a basket of ground coffee and into an upper collection chamber. The result is a strong, concentrated brew with a bold body and rich flavor that sits somewhere between drip coffee and true espresso in both strength and character.
One common point of confusion: Moka pot coffee is not technically espresso. A proper espresso machine operates at around 9 bars of pressure. The Moka pot generates approximately 1 to 2 bars. The coffee is strong, yes, but it lacks the crema and exact extraction profile of machine-pulled espresso. Still, Italians have been calling it "stovetop espresso" for almost a century, and that spirit is exactly right. It is concentrated, satisfying, and made with care.
For a deeper look at how the two brewing methods differ, see our guide on espresso vs. coffee.
Why the Moka Pot Is Worth Owning
In a world of expensive espresso machines and subscription coffee pods, the Moka pot is refreshingly straightforward. Here is why it earns a permanent place on the stovetop.
- Affordable. A genuine Bialetti Moka Express costs between $20 and $40, depending on size. It is one of the best dollars-per-cup values in home coffee.
- No electricity required. Works on any gas or electric stove. With a heat diffuser, it works on induction too.
- Portable. It goes camping, to vacation rentals, to the office kitchen. If there is a heat source, there is coffee.
- Durable. A Moka pot maintained properly can last decades. Replace the rubber gasket every year or two and it will keep brewing indefinitely.
- Scalable. Sizes range from 1 to 12 cup equivalents, so whether you are making a single strong shot or coffee for a group, there is a size for it.
- Simple to operate. No programming, no pods, no descaling cycles. Fill, heat, pour.
According to published research on Moka pot extraction chemistry, the brew method consistently produces a cup with higher dissolved solids and more pronounced body than standard drip coffee, which aligns with why it has remained popular for over 90 years.
The Components Explained
Before the first brew, it helps to know what each part does. The Moka pot has four main components.
- Bottom chamber (boiler). The water reservoir. Fill it with water before every brew. This is where steam pressure builds up during heating.
- Filter basket. A funnel-shaped perforated metal basket that sits inside the bottom chamber and holds the ground coffee. Water passes up through the coffee as pressure pushes it from below.
- Rubber gasket and metal plate. The gasket creates an airtight seal between the bottom and top chambers. Over time, gaskets wear out and should be replaced. A fresh gasket prevents leaks and inconsistent brews.
- Top chamber (collector). The upper section where brewed coffee collects through a central column. This is what you pour from.
There is also a small safety valve on the side of the bottom chamber. This releases pressure if the valve or spout becomes blocked. Never cover it, and inspect it occasionally to make sure it is clear. It is a simple but important safety feature.
Moka Pot Sizes
Moka pots are sized in "espresso cup" equivalents. One cup in Moka terminology is roughly 50ml, not a standard American coffee mug. Here is a practical breakdown.
| Moka Size | Approximate Yield | Best For |
|---|---|---|
| 1 cup | ~50ml | Single strong espresso-style shot |
| 2 cup | ~100ml | One small strong coffee |
| 3 cup | ~150ml | 1 to 2 people (most popular size) |
| 4 cup | ~200ml | 2 people or one larger mug |
| 6 cup | ~300ml | 2 to 4 people |
| 9 cup | ~450ml | 4 to 6 people |
| 12 cup | ~600ml | Groups, entertaining |
The 3-cup size is the sweet spot for most home brewers. It is easy to handle, quick to brew, and produces enough for one large strong coffee or two small ones. If you want to serve guests, the 6-cup is a good step up.
How to Use a Moka Pot: Step by Step
Follow these steps and you will get a great result from your first brew. The process takes about 5 minutes once you have the technique down.
-
Heat your water first (strongly recommended) Bring water to a boil in a kettle before you begin. Starting with hot water means the grounds spend less time in contact with the heating metal before extraction begins. Cold water prolongs this pre-extraction phase and can pull bitter, metallic notes from the filter basket. It also speeds up your brew.
-
Fill the bottom chamber Pour hot water into the bottom chamber up to just below the safety valve. Never cover the valve. The water level does not need to be exact, but topping out below the valve is the rule. You will learn your preferred fill level after a few brews.
-
Fill the filter basket with ground coffee Place the filter basket into the bottom chamber. Add ground coffee until the basket is full, leveling it off with your finger or a small spoon. Do not tamp or press the coffee down. Do not overfill. The basket should be full but loose. Tamping restricts water flow and creates dangerous pressure buildup. A level, unpacked basket is what you want.
-
Wipe the rim and assemble Before screwing on the top chamber, run a dry cloth around the rim of the bottom chamber to remove any stray coffee grounds. Grounds caught in the gasket cause leaks. Then screw the top chamber on firmly. It should be hand-tight, not wrench-tight.
-
Heat on medium-low Place the assembled Moka pot on a burner set to medium-low heat. For a gas stove, the flame should not extend beyond the base of the pot. For electric, medium-low on the dial. Resist the urge to crank the heat. Higher heat means faster steam, which means rushed extraction and a bitter, scorched result.
-
Keep the lid open and watch the flow Lift the lid on the top chamber and leave it open so you can observe the brew. After 3 to 5 minutes, coffee will begin to flow up through the central column. It will start dark and slowly lighten to a golden-brown foam or froth. This is the moment to pay attention to.
-
Remove from heat at the right moment When the coffee changes from dark liquid to a lighter, bubbly froth, remove the pot from the burner immediately. This golden foam signals that you are reaching the end of extraction. Continuing past this point pulls the last bitter compounds from the grounds. The accompanying sound is a gurgling or sputtering noise, which is your audible cue.
-
Stop the extraction Run cold water over the bottom chamber for a few seconds, or place the pot on a cold surface or damp cloth. This halts the residual heat from continuing to push steam through the grounds, which would over-extract even with the burner off.
-
Pour and serve immediately Stir the coffee briefly in the top chamber before pouring, as the first and last portions can vary slightly in concentration. Pour right away. Moka pot coffee left to sit in the top chamber over heat becomes bitter quickly.
Common Mistakes and How to Avoid Them
These are the errors that turn a potentially great cup into something disappointing. Knowing them in advance saves a lot of trial and error.
-
Tamping the coffee The Moka pot is not an espresso machine. Tamping compresses the grounds, restricts water flow, and causes the pressure to spike unevenly. The result is over-extracted, bitter coffee and potentially a small mess if pressure escapes around the gasket. Fill the basket loosely and level it off.
-
Using high heat More heat does not mean more coffee, it means worse coffee. High heat forces water through the grounds too fast, extracting bitter compounds and often scorching the brew in the top chamber. Medium-low is not a suggestion, it is the technique.
-
Grinding too fine An espresso-fine grind is too fine for the Moka pot. It packs together even without tamping and creates the same restriction problem. Use a medium-fine grind, notably coarser than what you would use for espresso.
-
Ignoring the gurgling The gurgling or sputtering sound is the Moka pot telling you it is nearly done. Leaving it on heat after this sound continues to extract bitter, dry compounds. Remove it as soon as the sound starts.
-
Filling water above the safety valve The safety valve exists to release pressure if something goes wrong. Covering it with water prevents it from functioning and can create a pressure buildup. Always fill below the valve.
-
Starting with cold water Cold water means a longer time on heat before extraction begins, during which the grounds are exposed to metal and indirect heat. This is the primary source of the metallic or bitter taste many beginners notice. Pre-heating the water largely solves it.
-
Letting it sit after brewing The Moka pot is not a thermal carafe. Coffee sitting in the top chamber over a hot burner continues to "cook." Pour within a minute of removing from heat.
Grind Size Guide
Grind size is one of the most important variables in Moka pot coffee. Too fine and you create resistance, pressure problems, and bitter over-extraction. Too coarse and the water passes through too quickly, leaving you with weak, under-extracted coffee.
The target is medium-fine: finer than what you would use for drip coffee, but noticeably coarser than espresso grind. If you rub a pinch between your fingers, it should feel like fine sand, not flour and not coarse granules.
| Grind Level | Texture Comparison | For Moka Pot |
|---|---|---|
| Espresso (very fine) | Powdered sugar | Too fine. Causes clogs, pressure issues, bitter brew. |
| Medium-Fine | Fine sand | Correct. Ideal for Moka pot. |
| Medium | Baker's sugar | Acceptable for lighter extraction. Slightly weak. |
| Medium-Coarse | Rough sand | Too coarse. Under-extracted, sour, thin. |
| Coarse (French press) | Sea salt | Far too coarse. Tastes like hot water. |
For a visual reference guide to grind sizes across all brew methods, see our coffee grind size chart.
If you are using pre-ground coffee from a bag, look for labels that say "espresso" or "Moka" grind, or ask for a medium-fine grind at your local roaster. If you have a burr grinder at home, set it one or two notches coarser than where you would grind for espresso.
Get brewing guides, roast updates, and early access to new coffees delivered to your inbox.
What to Make With Moka Coffee
The concentrated nature of Moka pot coffee makes it a versatile base for a variety of drinks.
- Straight, as intended. The traditional Italian way. Sip it small and strong from a demitasse cup. This is the purest expression of what the Moka pot does best.
- Americano-style. Pour the Moka brew into a mug and add an equal volume of hot water. The result is a full-sized coffee with strong flavor and none of the drip machine dilution.
- Cafe latte at home. Steam or heat milk separately, froth it with a hand frother, and pour over your Moka brew. No espresso machine needed for a solid latte.
- Iced coffee base. Brew as normal, pour over ice. Because the coffee is so concentrated, dilution from ice is actually a benefit here, not a problem.
- Coffee cocktails. Moka coffee is excellent in an espresso martini or mixed with a splash of amaretto. The strong brew holds its character even mixed with spirits.
- Cafe cubano. Whip a small amount of sugar into the first few drops of Moka brew until pale and frothy, then pour the rest of the brew over it. Rich, sweet, and bold.
Tip from the roastery: For an easy afternoon drink, pour a double shot of Moka coffee over ice, add a splash of cold oat milk, and a small drizzle of honey. No equipment required beyond the Moka pot and a glass.
Best Coffee for the Moka Pot
Roast level matters more for Moka than for most brew methods, because the high pressure and concentrated extraction amplify whatever is already in the bean.
- Medium roast: The sweet spot for Moka. A good medium roast has enough development to produce body and sweetness without the harshness of darker roasts. Colombian and Brazilian origins shine here.
- Medium-dark roast: Works well for people who prefer a bolder, fuller cup. The slightly darker development adds depth without tipping into bitterness, provided the brew technique is controlled.
- Light roast: Generally not recommended for Moka. The concentrated extraction tends to amplify the natural acidity of light roasts, producing a sour, harsh result rather than the bright clarity you would get from a pour-over. If you love light roasts, a pour-over or Chemex will serve you better.
- Dark roast: Proceed carefully. Dark roast in a Moka pot can become very bitter, especially if your heat is even slightly too high or you let it go a moment past done. If dark roast is your preference, be extra attentive on the timing.
The Moka pot is one of our favorite ways to make strong coffee at home without specialized equipment. Our Brazil single-origin and Breakfast Blend both work beautifully in a Moka. The Brazil has a natural sweetness and low acidity that holds up perfectly to the pressure extraction, and the Breakfast Blend is a reliable daily driver at any strength.

For a complete guide to how roast level affects your cup, the National Coffee Association roast guide is a useful reference.
Cleaning and Maintenance
Cleaning a Moka pot incorrectly is one of the most common ways to ruin future brews. The rules are simple but worth following.
- Rinse with hot water after every use. Disassemble the pot while it is still warm (not scalding), knock out the spent grounds, and rinse every component under hot running water. That is all.
- No soap. Dish soap strips the thin layer of coffee oils that builds up inside the pot over time. These oils are what gives a well-seasoned Moka pot its smooth, mellow character. New pots sometimes taste a little metallic until they have a few dozen brews worth of seasoning. Soap resets that every time.
- Dry thoroughly before storing. Moisture left inside causes mineral buildup and can degrade the gasket. Leave the parts disassembled and let them air dry, or pat dry with a cloth.
- Replace the gasket annually. The rubber gasket is the only part of a Moka pot that wears out. When you notice leaking around the joint or coffee weaker than usual, the gasket is likely to blame. Replacement gaskets are available cheaply from Bialetti and generic sources.
- Inspect the filter basket and safety valve. Occasionally hold the filter basket up to the light to confirm none of the small holes are clogged. Give the safety valve a gentle poke with a toothpick every few months to confirm it moves freely.
Frequently Asked Questions
Can I use pre-ground coffee in a Moka pot?
Yes. Pre-ground coffee labeled for "espresso" or "Moka" is usually at the right grind level. Regular drip-ground coffee is slightly coarse but will still produce a decent result. Avoid anything labeled coarse or French press grind.
Why does my Moka pot coffee taste bitter?
Bitterness in Moka coffee is almost always caused by one of four things: heat that is too high, letting the brew continue past the gurgling stage, grinding too fine, or starting with cold water. Address those variables one at a time and the bitterness will drop significantly.
Do I need a Bialetti specifically, or will any Moka pot work?
Any 8-sided Moka pot that uses the same basket-and-gasket design will produce equivalent results. Bialetti is the original and the most widely available, but there are solid alternatives from brands like Cuisinox and Alessi. The principles are identical across all of them.
How much caffeine is in Moka pot coffee?
A standard 3-cup Moka pot produces about 150ml of coffee containing roughly 150 to 200mg of caffeine, depending on the roast and grind. That is comparable to two standard 8oz drip coffees, concentrated into a much smaller volume. Per ounce, it is significantly stronger than drip.
Can I make decaf coffee in a Moka pot?
Absolutely. Decaf works just as well in a Moka pot as regular coffee. Use the same medium-fine grind and the same technique. A medium or medium-dark roast decaf will produce the best results.
My Moka pot is leaking between the chambers. What is wrong?
Leaking is almost always a worn or dirty gasket. Check first that the gasket is seated properly and that there are no coffee grounds caught in the rim. If the gasket is deformed or cracked, replace it. They cost a few dollars and are widely available.
Can I use a Moka pot on an induction stove?
Traditional aluminum Moka pots are not induction-compatible because aluminum is not magnetic. For induction, you need a stainless steel Moka pot (Bialetti makes an induction-compatible version called the Moka Induction) or an induction heat diffuser disc, which sits between the pot and the cooktop.
How many tablespoons of coffee do I use?
The filter basket determines the amount. Fill it to the brim, unpacked. For a 3-cup Moka, this is typically 2 to 3 tablespoons of medium-fine ground coffee. The basket is your measuring guide. Do not try to use less coffee than the basket holds. An underfilled basket produces uneven extraction.
Ready to Brew Something Great?
Our Brazil single-origin and Breakfast Blend are two of the best coffees you can run through a Moka pot. Roasted fresh and shipped to your door.
Shop His Word CoffeeSources: Specialty Coffee Association, Brewing Best Practices.


Leave a comment
This site is protected by hCaptcha and the hCaptcha Privacy Policy and Terms of Service apply.